
Blockchain made Easy – Part 2
Don't worry at all about the code, it is all available at my github repository and you can download it anytime. But try to make sure that you are following up with the steps involved because that knowledge is actually what you want not the code itself.
Creating Blockchain class
First we are going to import some libraries by writing the import keyword, and we are later going to use these libraries in our development. I'll be explaining each library and how it's going to be used within our development step by step.
import datetime

import hashlib

import json

from flask import Flask, jsonify
Now after importing our libraries we are going to declare Blockchain class which we will be requiring later on.
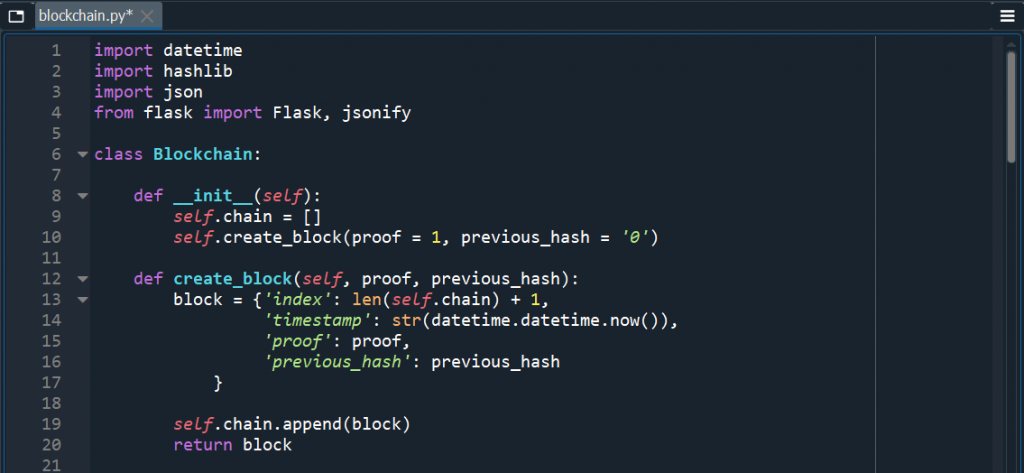
class Blockchain:
Creating __init__ method
After declaring class we are going to initialize the init method to self initiate this class object
def __init__(self):
Next we need to initialize the chain variable which will be a list of all blocks, and every newly created block will be appended to this list:
self.chain = []
Now we need to initialize the genesis block or first block of the Blockchain, here it will accept two arguments the first is the proof because each block will has it's own proof and secondly a previous hash value and for both we require arbitrary value and we assign proof = 1 and previous_hash = '0' and here we are assigning quotes because we are going to use SHA256 which can only accept strings.
self.create_block(proof = 1, previous_hash = '0')
Creating method to create Blockchain
Now let's declare the create_block method it will be able to create the genesis block and other mined blocks.
def create_block(self, proof, previous_hash):
Declaring block which will be a dictionary. And within this dictionary to get the index we just need to get the length of the chain + 1. And next to get the timestamp we use datetime library that we imported earlier and it's datetime module to get the current time and we put it in string otherwise we will be having format issues when working with json format. Next we need to get the proof of work and for that we will create a function later on.
block = {'index': len(self.chain) + 1,

'timestamp': str(datetime.datetime.now()),

'proof': proof,

'previous_hash': previous_hash

}
Now as the block is created we need to append it to the chain:
self.chain.append(block)
Now we need to return this block in order to show it's information in the Postman
return block
Creating method to get previous block
So, now we need to get the previous block and for that we declare a method which will only accept self argument because we only need self.chain list which has the last index of chain.

def get_previous_block(self):

return self.chain[-1]
Creating method to get proof of work
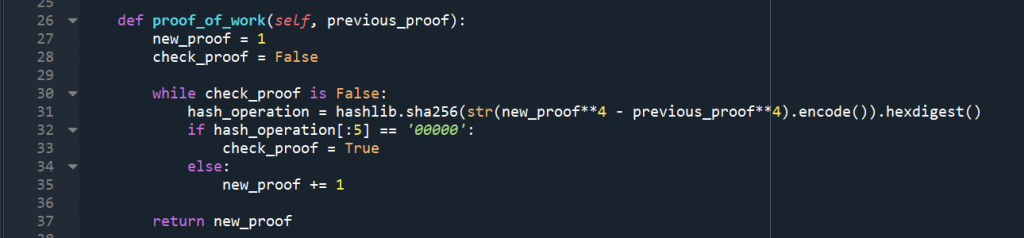
Next we need to create the proof_of_work method, here we will create a problem or puzzle for the miner to solve it and mine a new block. Proof of work is a number which is hard to find but easy to verify, because if it was easy to find then miner could have mined tons of blocks and it could have a less value for the cryptocurrency. This proof of work will accept two arguments, the first will be self because we apply this from the instance of the object that we created from the class. The second argument is previous proof, because in order to make that problem that miners have to solve we will take into account the previous proof, so the previous proof is an element of the problem that miners will need to consider to find a new proof
def proof_of_work(self, previous_proof):
We need to initialize the new_proof at 1 because to solve the problem we need to increment this value by 1 at each iteration until we get the right proof, because we are solving the problem by trial and error approach
new_proof = 1
Now to check if the proof is right or not we need to initialize a new variable which we set to False, once we get the right proof we set this to True and we end the WHILE loop
check_proof = False
Now we initialize WHILE loop until the check_proof is False
while check_proof is False:
Here we introduce the problem which needs to be solved by miner and we add str method which will convert it to string and then encode it so, if the answer of the problem is 16 then str will make it '16' and encode will add character to make it SHA256 acceptable like b'16'. And as we are dealing with Hexadecimal so, we add hexdigest method for conversion.
hash_operation = hashlib.sha256(str(new_proof**4 - previous_proof**4).encode()).hexdigest()
Now we set the second part of puzzle where we declare that if the initial 5 digits are 00000 then set the check_proof to True otherwise increment new_proof by 1 and check again
if hash_operation[:5] == '00000':

check_proof = True

else:

new_proof += 1
Now once we get the puzzle solved we return this new_proof, so it can be returned to the create_block method
return new_proof
Creating method to hash

Next we define a method to check if everything is fine in blockchain, first check if each block of the blockchain has correct proof of work by solving the problem to get a SHA256 value starting with 00000 leading zeros. Second we check that previous_hash value of each block is equal to the hash value of block mined before it. This method is going to take in a block and return SHA256 cryptographic hash of the block.
def hash(self, block):
Because each block of our blockchain is going to have a dictionary format so, first we will need to convert it to string through json library which we imported earlier by dumps function. We don't use the str function to convert it to string because later we are going to use the JSON format and str will not return JSON format. So, we are going to introduce a new variable encoded_block which will return the exact SHA256 cryptographic value that can be accepted by the hashlib.sha256 library. Here we are going to set the sort_keys true so, that the dictionary can be sorted according to the index.
encoded_block = json.dumps(block,sort_keys = True).encode()
Now we pass the encoded block into the hashlib library to return a SHA256 value and then convert it to hexadecimal by hexdigest method.
return hashlib.sha256(encoded_block).hexdigest()
Creating method to validate full chain
Now this is the second step where we will be looping through all of the blocks to see if the chain is valid.
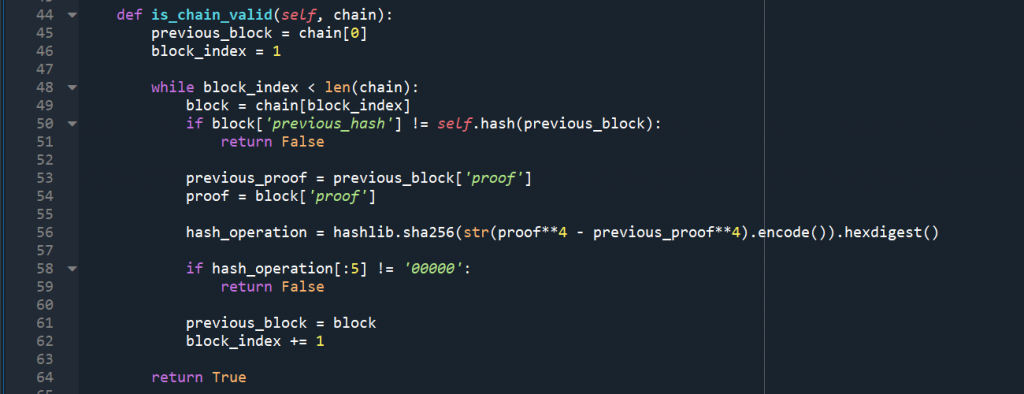
def is_chain_valid(self, chain):
Now to start the loop we are going to initialize the variables of the loop first so, we initialize the block index. As we are going to check the previous_hash value of current block is equal to it's previous block hash so, we will also need to initialize the previous_block variable that has the first block of the chain which we get by index 0 of the chain. Then at the end of the WHILE loop we will update the value of this previous block variable to be equal to the new block that we are dealing with in the iteration of the loop.
previous_block = chain[0]

block_index = 1
Next we start iterating WHILE loop we are going to set the condition that the block index should be less than the length of the chain.
while block_index < len(chain):
We check two things, first the hash is equal to the previous block hash and second the proof of work is valid. So, first we are going to get the current block and by setting the index of the chain to block_index which means we start from first block or genesis block of the chain.
block = chain[block_index]
Now we set the conditional statement to check if the previous_hash value is different then the hash value of previous block then we will return false because that means chain is not valid.
if block['previous_hash'] != self.hash(previous_block):

return False
We also do the check upon the problem if it is solved like the cryptographic value starts with leading 00000. So, we will take the previous proof from our variable previous_block and then we take the current proof by taking the proof key of the current block and then we will compute the hash operation between both.
previous_proof = previous_block['proof']
Now we take the current block proof
proof = block['proof']

hash_operation = hashlib.sha256(str(proof**4 - previous_proof**4).encode()).hexdigest()

if hash_operation[:5] != '00000':

return False
We need to update our looping variables, so, now the previous block will become our current block and we will also increment block_index by 1.
previous_block = block

block_index += 1
Finally, everything went well then we will return true in the loop
return True

Blockchain made Easy – Part 1
Are you willing to learn Blockchain really easy way? Do you want your career to get a boost with the upcoming Blockchain technologies? If yes, then you are at correct article. We are going to create a very simple and easy to understand, create and implement Blockchain right now by using Flask framework which is very easy to use Python based framework. And this is not what I'm trying to exaggerate by saying easy but you are going to see yourself in this article later on.
Pre-requisites to install
In order to start building our very first Blockchain the easiest way we will require two softwares on our machine.
- Python, make sure to download 3.x latest version
- Anaconda which is available for all operating systems
- Postman is also a free software to test our API requests. Don't be overwhelmed by the term API (Application Program Interface) it's just a fancy word used in development world which you are going to know later on.
After installation:
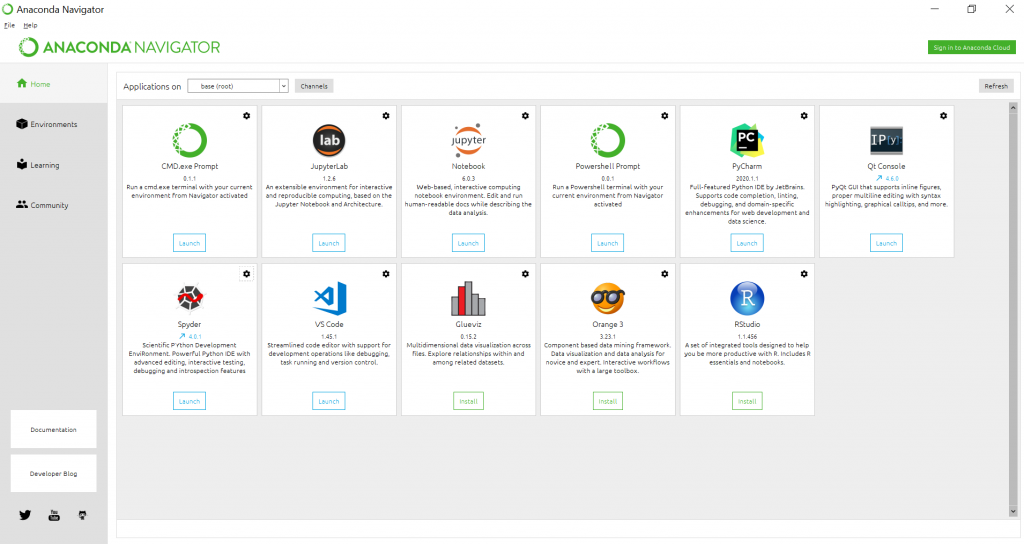
So, once you have finished installing all of the pre-requisites step by step and now you are ready to develop your first Blockchain. Now let's start Anaconda Navigator from your programs.
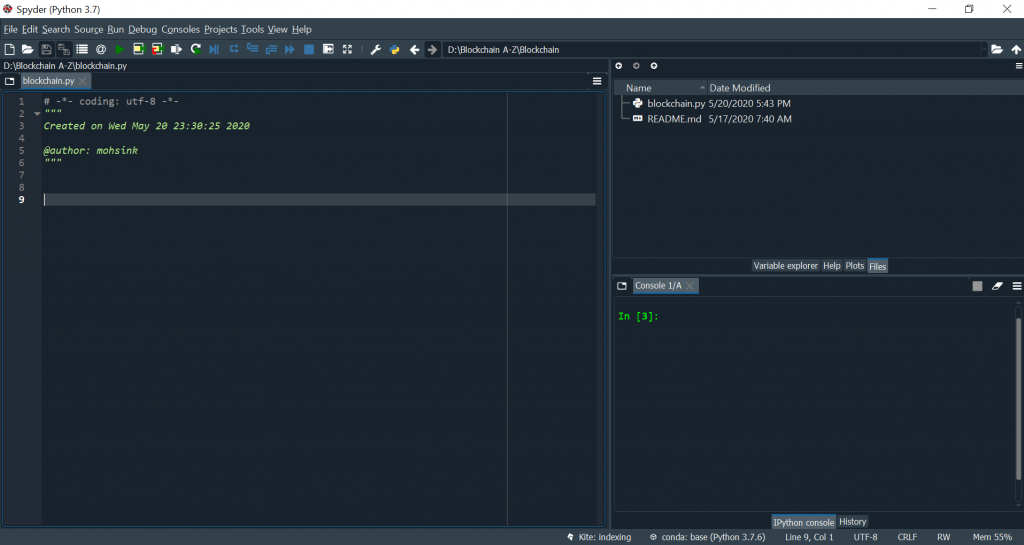
In Anaconda Navigator you will see few programs which are the editors to writing your first Blockchain. And I'm going to use the Spyder editor so, just click on it and it will be launched in separate window.
First we going to create a directory named blockchain in one of our drives. Now let's save the currently opened new file as blockchain.py in the directory because it is going to be a python file that's why we add extension .py at the end of this file.
Finally you have reached so far, that's really great you have completed your setup to start the Blockchain development. Now let's move on to the step two where we are going to dive into the code and develop our very first Blockchain.
Python Basics
So, you have decided to learn Python and you don't have any prior knowledge to any language then you are on the right place.
In order to learn Python we are going to do it in steps, each chunk is going to get you on the next level of the language. You just have to follow along and have faith in yourself that you can do it and most importantly practice for it as much as possible. Learning a new language is not an easy task but it is also not humanly impossible to do.
Learning any language
In order to learn any language you should try to understand few fundamentals involved which includes:
- Terms
- Data Types
- Actions
- Best Practices
Terms:
In every language we got different terms which refers to some specific words and their definitions. In order to understand a language we should get familiar with those terms and their definitions within the language itself.
Data Types:
In simple words its just type of data that can be stored in this language which includes the following types.
- Fundamental Data Types:
- int
- This stores any integer for example 2, 4, 5, 10, 100000, etc.
- We can perform arithmetic operations upon them for example add, subtract, multiple, divide, etc.
- Integers take less memory to store as compared to floating point numbers.
- float
- This stores a floating point number or decimal numbers for example 2.4, 10.9, etc.
- They take more memory space to store as compared to integers because the part before the decimal and after the decimal is going to be stored separately in binary code.
- bool
- str
- list
- tuple
- set
- dict
- int
- Classes
- None
- Specialized Data Types
Actions:
Every language consists of some input which a users provides to it and then it retrieves some output and finally perform some action upon it.
Best Practices:
There is always a way to do something and a better way to do the same thing. So, in best practices we are going to learn how to write an efficient and good code to perform something in Python.